Showing posts with label cooking. Show all posts

Tuesday, September 6, 2011

Heaven on a chip

Pico de gallo, which translates from Spanish as "rooster's beak" is a funny name for a food.  But this fresh salsa has become one of my family's favorite snacks this summer.  I was looking for something easy, inexpensive, healthy, and yummy for them to eat.  I've always enjoyed salsa fresca (fresh salsa) much better than the saucy, tomato based salsa in a jar.  Now, they do too!  


I start with Roma tomatoes.  You don't want the really soft, ripe ones.  Firm is better.  I make big batches, so I use 12, but you can halve that if you want.  Pico de gallo is better when eaten with the first day or two, so just make enough to last that long.  


Dice them up.  I like to cut them fairly small so a little bit of everything can make it onto the chip.


Next is onions and cilantro.  Here's the trick.  The tomatoes, onions, and cilantro should all be in equal proportion to each other.  The tomatoes don't rule this salsa.  


I use yellow onions.  Skin it, and cut it in half.  If you take a knife and make thin cuts all the way along one side, then......


Turn it the other way and make thin cuts this way, it'll just about be perfect.  Less mess, quicker dicing.  


I just give it a quick once over to make sure the onions are diced small enough.  I don't want any big chunks of anything in this salsa.  


See how the onions and tomatoes are pretty equal in quantity?  You want a nice 50/50 blend.  For 12 Roma's, this comes out to about 1 1/2 to 2 good sized onions.  


Next comes cilantro.  You tend to either love cilantro or hate it.  I LOOVVE it!  For this large batch you'll use about 1 1/2 to 2 bunches of cilantro, depending on how big they are.  I just scored some giant bunches at the store last night, so they'll go farther today when I make more.  Make sure you rinse it, as cilantro tends to be very sandy.  Cut off the stems (most of them...  don't worry about a little stem in there) and start chopping.  


Roll and wad it up into as tight of a bunch as you can, then start chopping.  Chop it fairly fine.


One third tomatoes, one third onions, and one third cilantro.  It sounds like a lot I know..   but it's sssooooooo good!


Lime and jalapenos.  They really give this some amazing flavor.


If you can find a really good sized, juicy lime, one is all you need.  Otherwise, maybe 1 1/2. Just mash it around before you cut it to release the juices easier.  Then cut in half and use a fork to squeeze the juice out.  


You have to be careful with these babies.  Wearing gloves is the smartest.  I made so much of this, I ran out of gloves, so I learned to be very, very careful.  Otherwise that jalapeno heat will stay under your fingernails, and then in your eyeballs for far too long.  For this sized batch, 2 smaller peppers is about right.  We like a good bit of heat in our salsa.  You can always do less...   or more.  


The seeds and white veins are what gives the pepper it's heat. It's best to remove the seeds.  I leave a little of the veins in because I want some heat.  If you want the flavor without so much heat, take all the seeds and veins out, and just use one smaller pepper.


Dice these up finely too.  That way the flavor and heat are evenly distributed and there won't be that one mouthful with a big chunk of pepper that clears your sinuses out.  


Ok.  Done.  That's it.  Well, you can add salt to taste, keeping in mind that most tortilla chips are already salty.  No oil.  No vinegar.  Just these few fresh, healthy, inexpensive ingredients.  It'll be heaven on a chip, I promise.  Of course you can use it on omelets, tacos, or just about anything.  We have kept the tortilla chip makers in business this summer!  But at least they were eating vegetables, right?  


Ok, so here's the recipe, family sized:


12 Roma tomatoes
2 large yellow onions
2 bunches of cilantro
1-2 limes
1-2 jalapenos
salt to taste

Saturday, January 29, 2011

Favorite Websites

I thought I'd post some of my most favorite websites.  Some are blogs, some have products for sale, some are just great information or resources.  But I LOVE them and wanted to tell you.


Thrift Books is awesome.  I have a passion for books (and unfortunately not enough bookshelves... ), but I also don't like parting with my money.   Buying used books has been great for our family.  We save so much money and often times you can't tell the used from new.  There are plenty of used book sites out there like Amazon.  But they all charge shipping.  Up to $4 per book.  Thrift Books charges no shipping and in most cases is significantly cheaper than other sites.  They may not have what I need, but it's always where I go first.  


Every Day Minerals is one of my newest favorites.  I like makeup. It covers my blotchy, rosacea tainted skin.  And I love pretty colors!  But most makeup doesn't cover my flaws very well, or irritates my skin.  About a year ago I started using mineral powder foundation.  LOVE IT!  However, the store brands have so many fillers that I often found my skin itchy.  Some other high end brands are..  well...   pricey.  Every Day Minerals is awesome.  So many choices for any skin undertone.  I found it very effective, non-irritating, and magically covering.  Her eye shadows have real lasting power and a rainbow of colors.  And her prices?   Wonderfully affordable.  You even get a discount of 20% if you purchase 5 full sized products, which I just did.  Don't know which color foundation to choose?  She offers free sample kits of 5 shades to try.  You only pay $3 shipping.  


The Lettered Cottage.  My home is horribly "un-designed".  It's what you'd call...  umm....   we're too poor and busy raising 7 kids to have a definite style.  Or time to decorate.  Or money to do it.  Or the creativity to make it happen...  well you get the idea.  I know what I like when I see it.  I want my home to feel peaceful, simple, clean, inviting and not overly formal.  THIS is how I want my house to be.  They have stunning before and after photos that give me hope!  And while I haven't gotten to all the site content yet, they claim they do this all on little or no budget.  Amen.  Someday, my house will echo their work.  Sigh.  Just click on before and after on the menu bar.


The Pioneer Woman.  Ree Drummond is my hero.  She writes better than me, cooks better than me, does photography better than me, and probably home schools her kids better than me.  She's witty, talented, gracious, generous, and frankly honest.  Her frequent give aways are fun.  I subscribe and get her daily digest in my email in box.  When I grow up I want to be Ree Drummond.  If you want information on life, children, homeschooling, cooking, design, or a host of other topics, her blogs/website is the place to go.


All Recipes.  I'm a cookbook freak.  I collect cookbooks like some people collect coins, or shoes.  Yet for all the cookbooks I have, there are days I can't find what I need.  Or, more to the point, can't remember which cookbook that recipe is in.  It's hard getting old.  But, All Recipes is a very searchable site with lots of variations to make anyone happy.  Recipes can be scaled smaller or bigger, and you can even print off the recipes index card sized and ready to file.  Or, you can register for free and file your recipes in your virtual box.  Some days, it's a lifesaver (or dinner saver).  


Teach With Movies.  A friend sent me this link.  I don't know about you, but along with entertainment, sometimes I want my kids to actually learn something from the movies we watch...  without showing those boring documentaries we saw in school.  You know, the ones that for decades seemed to always be narrated by the SAME man.  (how is that even possible?).  Anyways, you can search for movies by topic.  And for a  very low yearly rate you can subscribe which opens resources like lesson plans and learning guides for over 300 movies!  It's genius.  


I hesitate to mention the next one.  For a few reasons.  One, it's kind of blatant self promotion (not that a blog isn't I guess, right?).  Second, it's not like that many people read my blog that it would really benefit me in any way. Third, my mentioning this tends to scare people away as if I will hunt you down and trap you like some stereo-typed version of a used care salesman.  Which puzzles me really.  Anyone who knows me knows I'm not like that.  A lot of people I know don't even know this about me (like I'm a secret agent or something), but I have a telecom and energy services business.  Few people know, because I clearly have a lot to learn about being in business!  I assure you it's legit.  Above board.  A lot of fun actually.  And my saving grace to not have to go back to work full time (because although I don't begrudge that choice to anyone...  it's not one I want to make).  


I simply broker services through arrangements with companies like Verizon, AT&T, Sprint, Dishnet, ADT security and other highly well known and reputable companies.  It won't cost you a penny more than you already pay for stuff you already use.  It makes my desire to stay home with my children a reality.  Check out what I have.  If you or someone you know is looking to switch or just renew services, PLEASE ask me first or send them my way.  I will love you forever and ever.  You may even find me at your door with a plate of warm and gooey chocolate chip cookies as a thank you!  Think about that.  Verizon never did that for you, huh?


Well, these are just a few of my favorite sites and I hope you find something useful on them.  Don't hesitate to shout out one of your favorites.  It might become one of mine!


Saturday, January 8, 2011

The Womanly Art of Breadmaking

Today seemed like a good day to teach the little girls the womanly art of bread making.  Bread making is fun.  Especially for kids.  You get to dump lots of stuff into the mixer.  Yeast is fun to smell (not!).  Plus the idea of yeast "eating" the sugar and flour and then "burping" gas to make it grow...   you get a little gross out humor too.   It's also kind of cool that from a lump of flour, water, yeast and a few minor things, you can make FOOD!   


It today's fast paced world, where so many people don't even cook or share meals together, I think there are some valuable skills that need preserving.  You may not choose to make all your own bread all the time.  But it's good to know you can if you need to (store's closed, car won't start, lost your debit card....).  It's a good feeling to know in today's wacky economy and uncertain times, that you CAN control something.  You can rise above that mess a little bit and be self sufficient.  


We started with some wheat grinding today.  Our wheat grinder is ancient!  I mean, really, look at it!  It weighs a ton and everyone is deafened for the time it's running.   Fun, fun, fun though.  If you're a kid, the more noise the better, right?   


After all, Rapunzel must have made her own bread up in that tower, don't you think?   So now we have a nice batch of whole wheat flour (half red and half white...   because I'm in love with the white wheat, but can't bear to just waste the red).  Anyone out there want to trade me some hard white wheat for my hard red wheat?  *sigh*   I didn't think so. 


Natalie and Chloe both wanted to help and asked a lot of questions.  I have to admit...   I am not good at sharing my kitchen.  I'm usually short on time, I know exactly what I want to do and how I want it done, and I don't always have the patience to slow down and endure bigger messes so my kids can learn.  Especially in the kitchen. I know, terrible isn't it?  I'm trying though!  


They didn't even fight (much) over who got to dump what into the mixer.  I have to remember that even young kids are capable of SO much.  After one cupful of flour, I left Chloe alone to put on the lid and start the mixer while I was in another room.  Which she did.  With no problem.  


After all the mixing...   we're just waiting for the bread to rise....   


and we're back!  Ok, so the girls had a good time kneading the bread (which we failed to get photos of).  


But this is the face of a girl who got to pummel some bread dough.


"You did not just touch my dough!"


"I am a force to be reckoned with!"  (and don't we all know it).  


So we got the bread into the pans.  I LOVE these long loaf pans.  They're shaped like the store-bought bread that most kids are familiar with (unless they've only known homemade).  I make at least 4 at a time and freeze them, which lasts for a week or two.  


I wish you could smell this....  mmmmmm......  it smells lovely in here!  Fresh baked bread.  YUM.  You know you want some  :)

Wednesday, December 1, 2010

Spicy Asian Peanut Sauce

Spicy Asian Peanut Sauce is to die for.   I love flavors that are a little bit sweet and a little bit spicy, and complex.  I really love Asian food in general, and this is such a simple and versatile sauce I wanted to share it.  

all photos courtesy of Alyssa

Here's what you'll need.  You'll have to excuse the JUMBO sized containers, they lack that aesthetic beauty, but  it's how we roll around here!  So you need honey, peanut butter (smooth or crunchy), vinegar, oil, chili oil, soy sauce, garlic, and water.  I love recipes that are adaptable, and this one is.  You can use sugar instead of honey, cider or seasoned rice vinegar instead of plain, chili paste instead of oil, and sesame oil in place of half the cooking oil.  The amount of chili oil or paste is completely variable, but do add some.  For my kids, about 1/3 of what's called for works great.  

I was going to take pictures of the process, but it's so easy it's boring to look at.  You just combine all the ingredients, in any order you like, into a small sauce pan (or a big one if you want to double the recipe).  


Here's the crunchy peanut butter being added.  


You want to heat it (stove top or microwave), just til the peanut butter and other ingredients melt together and combine. 


It should have just the right amount of thickness to cling to whatever you add it to, not as thick as gravy.


Remember I said how versatile this is?  It's great on noodles.  Soba noodles, spaghetti noodles, bean thread noodles, almost any kind of noodles.  And on  vegetables like broccoli, or snow peas, or carrots....   it's good on chicken or fish, including shrimp.  Wonderful on rice too.  


We most often use it as a side dish and just put this over spaghetti noodles when serving chicken or fish...  especially if the main dish has a bit of an Asian flavor to  it already.  I like to use leftovers for a healthy lunch.  Take rice or noodles, any combination of stir fried veggies, and you have a quick and light lunch.  My kids think it's ok.  I LOVE it.  Oh, and I've tried buying bottled peanut sauce thinking it'd save me some time.....   so NOT the same.  I don't know what they do, but it's not nearly as good.  


Spicy Asian Peanut Sauce


4-6 cloves of minced garlic
3 T oil
3 T water
3 T soy sauce
1 T hot chili oil
1 T honey
2 T vinegar
1/4 c peanut butter

Wednesday, November 17, 2010

Fresh Cranberry Orange Relish


I love cranberries, but I'm not a big fan of the canned, jellied cranberry sauces.  They're ok.  They have their place (I guess).  And I know some of you really really like it.  But you have to try  fresh cranberry orange relish!  Only half my family will touch a cranberry sauce/relish of any kind...  and this is what they prefer.  It's super easy to make, good for you, and yummy!  Cranberries have anti-oxidant and anti-bacterial properties...   you can't say that for much of the food on our Thanksgiving tables, so eat up!


You'll need 1 lb of fresh or frozen whole cranberries, sugar, canned mandarin oranges (or fresh orange sections if you prefer), and a bit of cinnamon.


Use a blender or food processor to chop the cranberries.  You don't want a fine puree.  If a few berries make it through practically whole, no problem.


This is how they should look.  If you use a blender or small processor, you'll want to do this is 2 or 3 small batches.  


Add about 1 cup of sugar.  You may want it a little more or less tart...  so you can add slowly and adjust to taste.


Now you can put in 2 small cans of drained, Mandarin oranges, (or about 2 cups of fresh orange segments)


About 1/2 tsp of cinnamon..  again you can adjust to taste.  You really can't mess this up.


Give it a stir and let it chill for a couple of hours to mix the flavors and dissolve the sugar. You want the oranges to break into smaller pieces, so don't be too gentle.  I love how the cranberries keep their crunch this way, and how some larger bits of cranberry burst in your mouth.  Heavenly!  


(In the spirit of full disclosure, I'll tell you that this recipe can also be made as a cooked version, but that would be so sad.) 

Tuesday, November 2, 2010

PUMPKIN RECIPES

I don't love how early it gets dark in November.  I don't like the cold wind that can blow right through a person.  But I do love the warmth and comfort of fall foods!  We especially love pumpkin.  First of all, it's a vegetable, so how's that for healthy! 1 cup of pumpkin has 19% of your daily vitamin C, and 245% of your vitamin A!  It's loaded with important anti-oxidants.   And it's pretty versatile.  I thought I'd share several of our favorite pumpkin recipes....  some we use year round, because we like it that much.  


I don't have pictures of all of these.  That would require me to actually stay home for a few days in a row and cook and bake (which I LOVE) but I haven't been finding the time for... but I'm going to have to!  These are too yummy to pass up.  Oh, and if you've never discovered the bliss of dark chocolate with pumpkin....   you've been missing out.


Pumpkin Chocolate Chip Pancakes

These are light and fluffy and yummy and good for you and a little indulgent too.  I quadruple this and freeze the extras for quick breakfasts because I'm just that lazy.  They defrost nicely in the microwave. 

2 cups flour (I use at least half whole wheat)
2 Tbs packed brown sugar
1 Tbs baking powder
1 tsp salt
1 tsp cinnamon
1/4 tsp nutmeg
1/4 tsp ginger
1 1/2 cups milk
1/2 cup solid pack pumpkin
1 egg, slightly beaten
2 Tbs oil
1/2 cup or more semi-sweet chocolate chips

Go ahead and preheat a griddle.  I prefer cast iron, but whatever you're used to is fine.  Then combine all the dry ingredients in a large bowl.  In a separate bowl, combine remaining ingredients and mix well.  Add this to the flour mixture and stir until just moistened.  The batter will be fairly thick.  Add the chips and stir lightly.  The batter is too thin if the chips sink to the bottom.  They should be held in suspension.  

Using a 1/4 cup measure, pour batter onto the hot seasoned griddle.  Cook until the edges appear slightly dry, then flip.  


Pumpkin Swirl Cheesecake

We love cheesecake.  We love pumpkin pie.  So this is the perfect combination.  

3 8 oz packages of cream cheese (we use 1 fat free and 2 low fat)
1 cup sugar, divided
1 tsp vanilla
3 eggs
1 cup pumpkin
1 tsp cinnamon
1/4 tsp nutmeg
dash of cloves
2 cups crushed ginger snaps
1/2 cup chopped pecans
6 Tbs butter

Crush the gingersnaps, add the finely chopped pecans, and add the 6 Tbs of butter.  This is the crust.  Press this into the bottom of a springform pan and 2 inches up the sides.

Beat the softened cream cheese, 3/4 cup of sugar, and vanilla.  Add the eggs.  Reserve 1 1/2 cups of plain batter, then stir the remaining 1/4 cup sugar, pumpkin, and spices into the batter.  Spoon 1/2 the pumpkin batter over the crust.  Use 1/2 the plain batter and drop in dollops.  Repeat the layers and cut through gently with a knife to swirl.  

Bake at 325F for about 55 min, til almost set.  Chill for 4 hours.


Pumpkin Bars

1 cup wheat flour
1 cup of white (you could use all whole wheat)
1 Tbs pumpkin pie spice
1 tsp baking soda
1 cup butter
1/2 cup sugar
1/2 cup brown sugar
1 cup pumpkin
1 egg
2 tsp vanilla
1 cup chocolate chips

Combine dry ingredients.  Beat butter and sugars in a large mixer til creamy.  Beat in pumpkin, egg, and vanilla.  Slowly beat in flour mixture.  Spread in a greased jelly roll pan. Sprinkle the chips on top and bake at 350F for 18-22 minutes.  We get RAVES on these wherever we take them, and they're gone in minutes at home.


Pumpkin Banana Smoothie

This is a super healthy, super tasty breakfast treat.  It'll make 2 adult servings and will stretch further if feeding little ones.  

  • 1  cup  low-fat vanilla yogurt
  • 3/4  cup  canned pumpkin, chilled
  • 1/2  cup  ice cubes
  • 1/3  cup  fresh orange juice
  • 1  tablespoon  brown sugar
  • 1/2  teaspoon  ground cinnamon
  • 1/8  teaspoon  ground nutmeg
  • Dash of ground cloves
  • 1  ripe banana, sliced and frozen
  • Dash of ground cinnamon (optional)


I hope this adds to your autumn enjoyment!  

Monday, October 18, 2010

Dark Chocolate Pudding


I LOVE dark chocolate.  I know some people prefer milk chocolate (though I'm not sure why).  I made this dark chocolate pudding last week and it was SO good I had to share.  If you don't like dark chocolate, you can adapt it.  What's so great about this, is that it's homemade...  no artificial ingredients or chemical additives, not to mention a whole lot less sugar, and fat,  than the store varieties.  If you have a real sweet tooth, you can increase the sugar if you like, but the dark chocolate and slightly less sweetness makes this a more grown up and sophisticated dessert.


You'll need milk (I use 1% but you can use whatever you like), water, vanilla, beaten eggs, sugar, cornstarch, and Hershey's special dark cocoa powder (or regular if you don't like it so dark).  


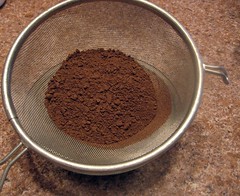
You'll want to sift the cocoa powder through a small sieve to help it mix smoother later on.


Start by pouring the milk into a medium sized pan.


Then add the sugar,


and the cornstarch.


Whisk it all together really well and turn the heat on to medium.  


Let it simmer, but watch it carefully and whisk it often to make sure it stays well mixed and doesn't stick to the bottom where it can burn.  As it gets hot, the mixture will begin to thicken.


Meanwhile, you can add the sifted cocoa powder to the warm water and whisk well.


It's a little resistant to mixing at first, but just keep whisking....


and it'll all come together in a wonderful puddle of dark chocolate goodness.


It's time to add the beaten eggs....   but you can just dump them in or you'll have scrambled eggs, not pudding.  The eggs need to be tempered, which just means slowly warmed up.  Take about 1/2 a cup of the warm, thickened milk and add to the bowl of eggs.  


Whisk it together, then add another 1/2 cup of thickened milk.  Now, the eggs are warmed up.


Pour the egg mixture slowly into the pan and whisk well over medium low heat for just a minute or two.


When it starts to bubble, it will thicken even more to a nice, creamy texture....  like pudding.  Now add the vanilla, and you have boring vanilla pudding.....


Until you add the cocoa mixture and the magic begins!


Mix it all together until the chocolate is fully incorporated 


and it's a delicious pot full of dark chocolate pudding.


It's not done though!  I know, I know...   the temptation to take a big straw and just suck the hot pudding up like a milkshake is overwhelming.....   but it's HOT and I don't want you to burn your mouth.  So....


Put your pudding into a glass bowl, and put some plastic wrap directly on the surface of the pudding.  This will keep it from forming an icky looking "skin" on top as it cools.


Put it just like this into the fridge and wait a couple of hours (or as long as you can) for it to cool and thicken even more.


Then grab a dish and a BIG spoon and dig in!  There's nothing so comforting on a chilly fall night as a dish of dark chocolate pudding (still a tad warm because you couldn't wait any longer).


Dark Chocolate Pudding


6T sugar
4 cups milk
6T cornstarch
4 eggs, beaten
2 tsp vanilla
1/2 cup Hershey's dark cocoa powder
1/2 cup warm water


Sift cocoa powder and set aside. Pour milk, sugar, and cornstarch into a medium saucepan and heat on medium.  Stir often with a whisk.  Meanwhile, add cocoa powder to the hot water and whisk until smooth and creamy.  When the milk is thickened and bubbly, remove from heat.  Take 1/2 cup of hot milk mixture and blend into beaten eggs to temper.  Add another 1/2 cup of milk mixture and blend well.  Slowly pour warmed egg mixture into the pan and stir well.  Return to medium low heat and whisk until it bubbles and thickens more.  Remove from heat and add vanilla and cocoa and blend well.  


Pour pudding into glass bowl and place plastic wrap directly on the surface of the pudding.  Let cool in the fridge for until thickened and just slightly warm.